 Yesterday was the first time in months I’ve ridden my bike in a t-shirt and riding home on by far nicest day we’ve had this year I realized that Spring is finally here! For a lot of you “fair weather” cyclists out there, this means you can finally get back on your bike without the fear of being frozen solid or ending up in a snow bank. And for those who have been braving the cold all winter, it might be time to put away the winter beater and take out the pride of the fleet that’s been hibernating in the garage or basement. Either way, you’re probably about to start riding a bike that hasn’t seen any action in a few months. Even if your bike was in working order as you retired it for winter, it will likely need a tune-up before it’s ready for spring.
Most anyone can perform a simple bike tune-up, and you can save some money by doing it yourself; it’s also very satisfying to work on your own bike. But if you don’t feel confident in your mechanical abilities, or you have doubts about the work you’ve done, or even if you don’t want to get your hands dirty, you should take your bike in to your local shop and have them give it a safety check before taking to the streets.
Spring Cleaning
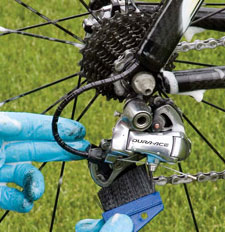
 It’s import to thoroughly clean your bike. Keeping your bike clean can actually extend the life of your components. Built up dirt, grime and old grease can prevent the moving parts of your bike from functioning and can lead to premature corrosion. And if you’ve been riding through the winter, it’s very important to get all the road salt off your bike as nothing rusts faster than a salty bike. Take the time to clean every inch of your bike and look for any cracks or wear that could lead to part failure in the future. You should pick up a biodegradable de-greaser to clean your chain, chainrings, derailleurs and cassette. There are fancy chain cleaning tools out there but a tooth brush will work just fine (just don’t go back to using it on your teeth after). Try to use as little water as possible when cleaning these areas. You should also remove the seat post from the frame, wipe it down and clean the best you can inside the seat tube. Then, apply a bit of grease to the post and re-install. You don’t want a creaky seat post or one thats permanently rusted in place.
Is It True?
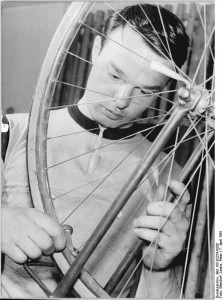
 Next, take a look at your wheels. I’ve found that rubbing alcohol and a rag work quite well to clean up grimy rims. Spin the wheels and check if they are true. If you don’t have a bike stand, this may be easiest with the bike upside down, resting on the seat and handlebars. If you have a wobbly wheel it’s usually a fairly inexpensive job to have it trued at your local bike shop.
Brakes!
You’ll also want to check out your brakes. If you have rim brakes, inspect your brake pads. They should be wearing evenly and should contact the rim at the same time when you pull the lever. If not, you’ll need to adjust your brakes. If the pads seem worn down or very hard, you’ll need to replace them. Old brake pads tend to dry out and harden making them far less effective. If you have disc brakes, make sure the pads don’t rub the rotor as you spin the wheel. If they need an adjustment, you’ll likely need to grab a 5mm hex wrench and fine tune their distance from the rotor. With either type, squeeze the levers and make sure the brakes fully engage. If it seems difficult to engage the brakes, it could be an issue with the cables (we’ll get to those later). If you have any questions about your brakes or can’t tell if they’re functioning properly, head down to your local shop and have them take a look – it is very important that you be able to stop!
Drive Train
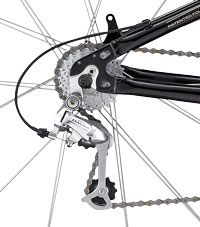
Next you’ll want to make sure your drive train is in working order. This is where a bike stand really comes in handy but it’s certainly possible to do the work without one. Lift the rear wheel off the ground and turn the pedals. Shift through all the rear gears to make sure your derailleur is working properly. There will likely be a few adjustment screws that control the rested position of the derailleur when in gear. You can use these adjustment screws to calibrate the derailleur if it’s skipping or getting caught between gears. If you can’t seem to get it to shift smoothly, you may need to replace the chain or cassette. Depending on how much riding you do, bicycle chains can wear out in as little as 6 months to a year. Test out the front derailleur as well and adjust if needed.
If you ride a single speed or fixed gear, like the Montague Boston, you don’t have to deal with the hassle of derailleurs. Just make sure you have enough chain tension (the chain should be taut, but not tight, and certainly not sagging). If needed, loosen the bolts on the rear hub and slide the wheel back in the dropouts to tighten up the chain.
Cables
Dirty or rusty cables or housing can affect shifting performance or make it difficult to engage your brakes. Changing your cables every 2-5 years is a smart move but if you ride this bike through the winter, it can become an annual task. You can buy spools of cable and housing (or shorter lengths) from your local bike shop and install them yourself – all you need are some good cable cutters. Once your fresh cables are installed, you’ll have to readjust your brakes and derailleurs.
Tires
 Check your tires for signs of excessive wear. If the tread is worn down or there are tears in the sidewall, you’ll want to replace them. Older tires with dried or cracked sidewalls are prone to blowouts and should also be replaced. Check the recommended psi for your tires (printed on the sidewall) and break out the bike pump. Under-inflated tires have more friction with the road meaning more rolling resistance. They are also prone to pinch flats. You should check your tire pressure before every ride, but if your tires are flat or noticeably softer after a couple days, you’ll probably need to replace the inner tube.
The Final Step!
The last thing you want to do is apply some fresh lube. Keeping your chain lubricated is extremely important and you should purchase a lube specifically designed for bicycle chains. Thoroughly coat the chain and let it sit for a few minutes. Then, wipe off any excess so it doesn’t end up all over your pant leg. You can put a few drops of lube on the pivot points of your derailleurs and brake levers as well as the exposed bits of brake cable (note: some higher end cables are made from Gore-Tex or Teflon and should not be lubricated).
Mount Thy Noble Steed.
Once you’re sure your bike is in good working order, there is ONE more step: hop on your bike and go for a ride.
Even after a tune-up, you might find that your bike is beyond repair. If that’s the case, consider picking up a brand new 2011 Montague Folding Bike!


